
Wreck photography is a favorite subject for divers, and even those who don’t seek out wrecks usually will dive a few eventually. There is a unique human connection between these man-made objects that now rest on the seafloor, and it can be exciting to tell the stories of these wrecks through photography.
Whether showing the expanse of a 500ft long luxury cruise liner turned WWII ship or how a ship destines for scrap metal has rejuvenated a reef by providing a new home for marine life, the photo ops are endless.
There are two types of wrecks: those that ended up underwater by mistake (be it bad weather, war, mechanical issues, or any reason on the long list of why ships sink) or those that are sunk on purpose for the means of creating artificial reefs.
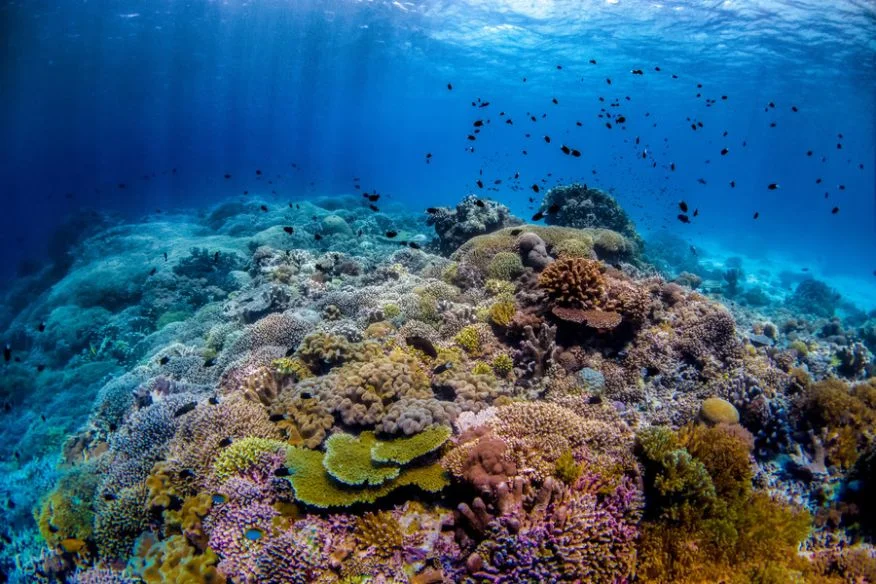
The latter are cleaned up and removed of pollutants and sunk in a specific location, often to the advantage of scuba divers and in hopes of attracting marine life and becoming a new home for reef life.
Wrecks can be photographed in many different ways and the best way to get great images is to start with a plan. Often expansive, there can be a lot to photograph, so learn what you can about a wreck before the dive and start creating ideas before you even get underwater.
It’s important to know things like what part of the wreck do you want to photography? What sort of message or story do you hope to tell? Can you get to a certain part of a ship safely and with your current level of training? Here are some tips:
Wide-angle
Obviously shooting wide-angle is a great way to capture wrecks. Fisheye lenses are popular because they allow focusing at very close distance and they give a large view (both of which can be great in tight spaces or to show an almost 180-degree angle of a large portion of a wreck).
The fisheye effect, which distorts the image, can sometimes be more noticeable with wrecks than in reef scenes because wrecks will have straight lines that may appear not straight.
If the distortion is undesired, it can be fixed to some extent in post-processing. Other wide-angle rectilinear lenses are great too and have less distortion.
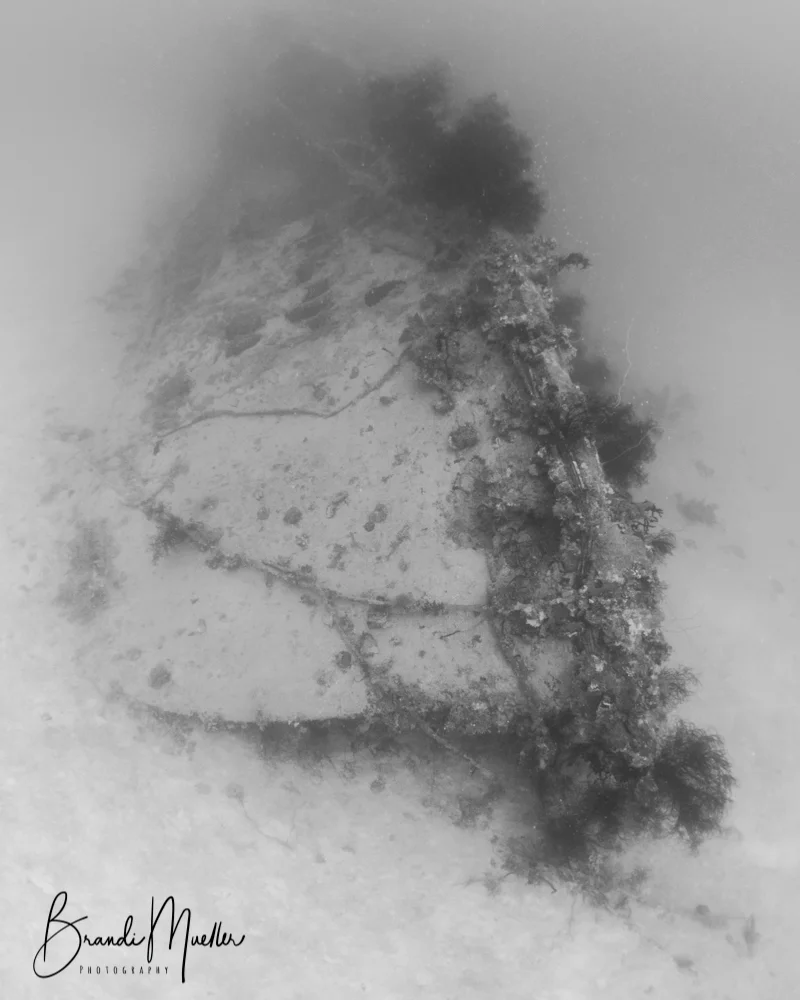
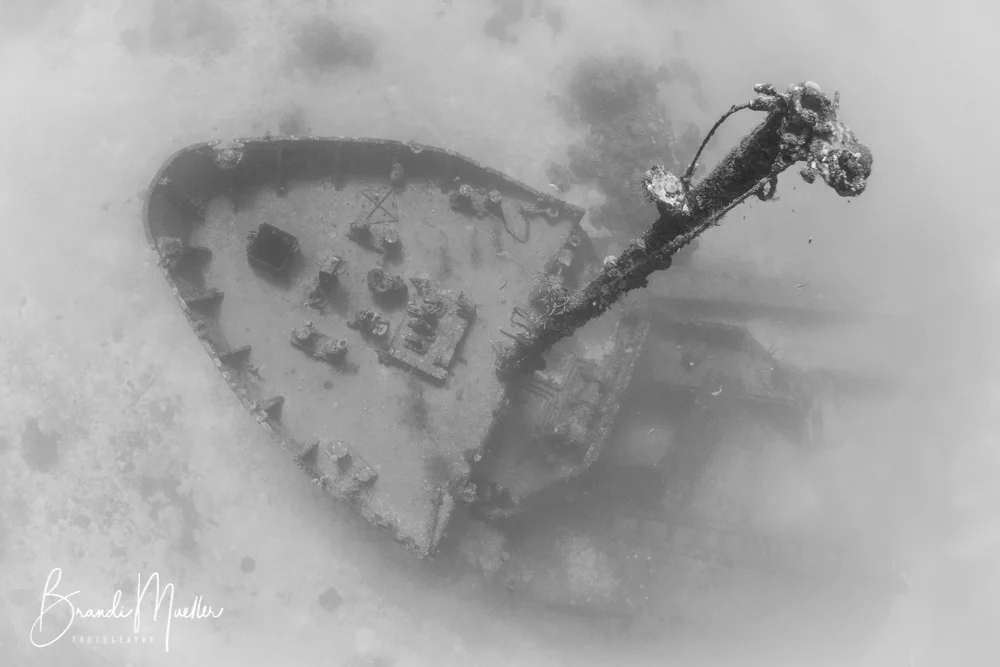
- Black and White: Images in black and white tend to add a spooky or mysterious feel to wreck images. Converting a shot that didn’t quite turn out right to black and white can also be a way to “save” a photo.
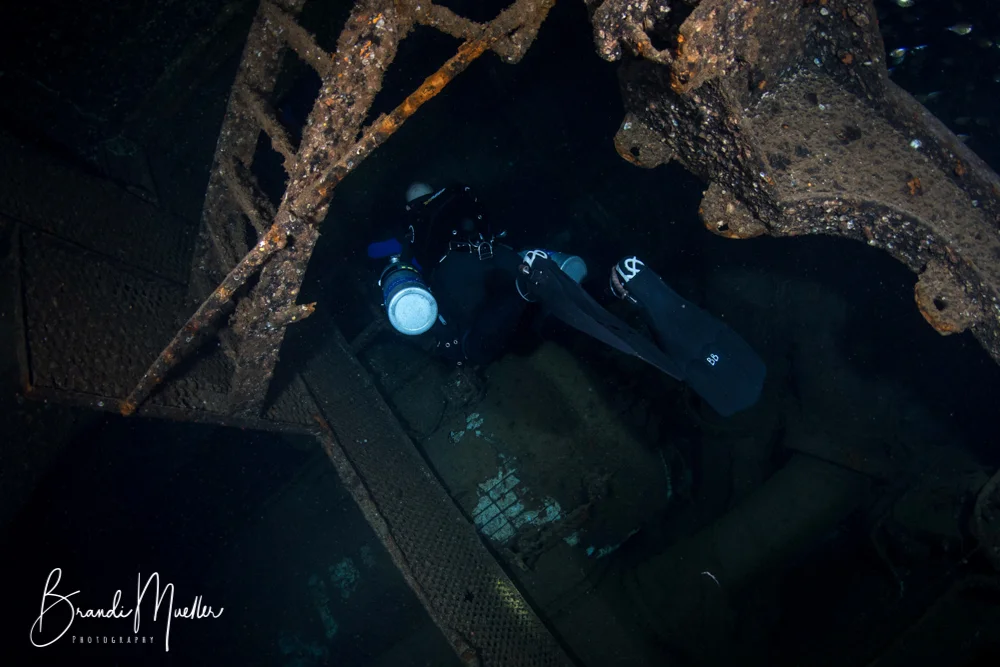
- Divers: Adding divers to images can help show scale. Having the silhouette of a diver swimming over a huge wreck can help viewers see how large the wreck really is. Using a diver shining a flashlight on something interesting can draw attention to that subject or a photographer can suggest what the viewer should focus on by having a diver look at the desired subject. In places where divers are allowed to touch artifacts or objects in the wreck, images of divers with those objects can also be appealing.
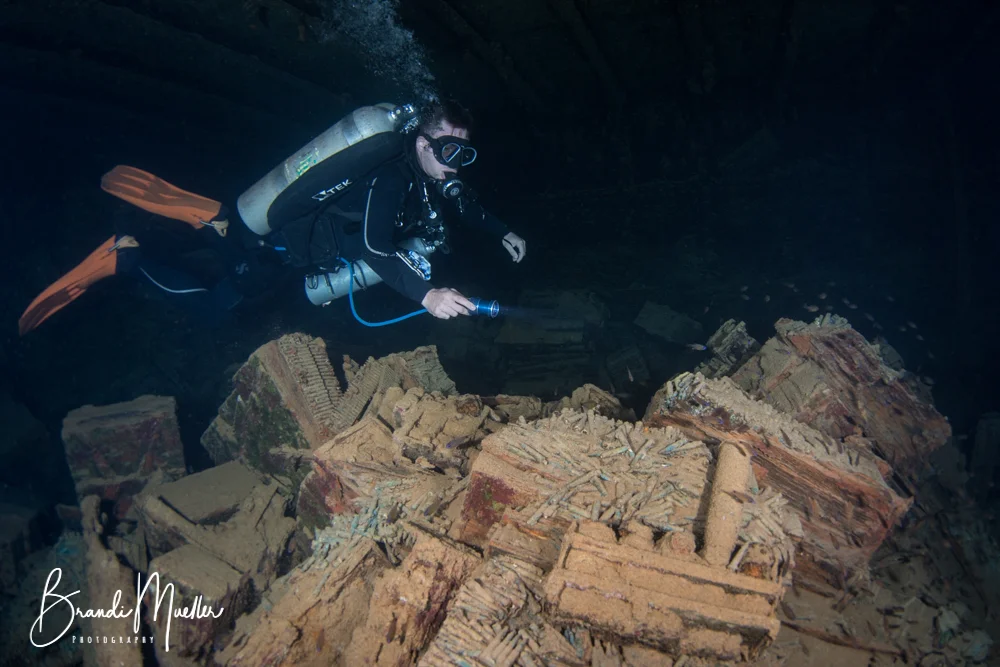
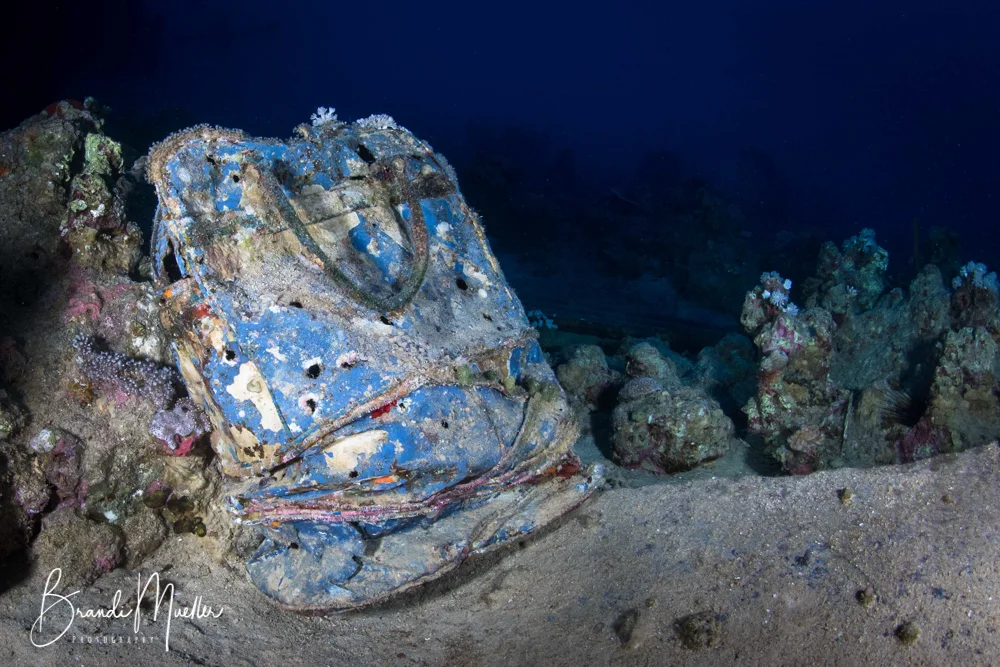
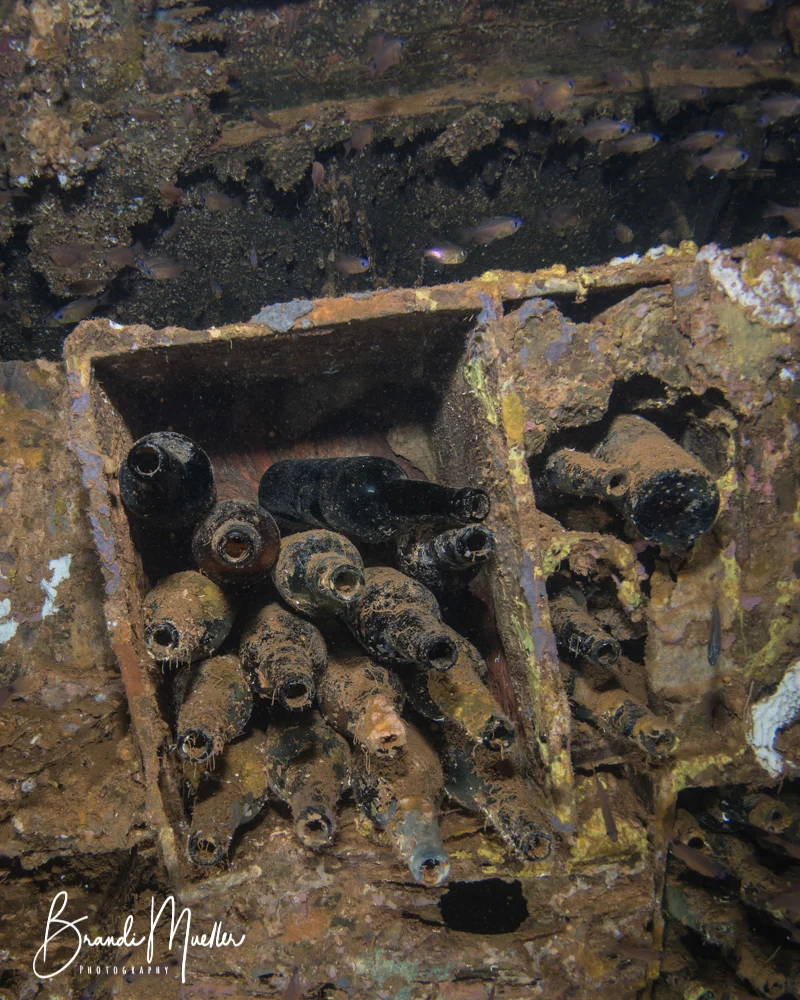
- Artifacts: In wrecks such as those that went down during wartime there are often many exciting objects to take photos of. Capturing the ammunition of a 75-year-old gun becomes a museum-worthy historical reference. Suitcases strewn on the seafloor from a ferry that sank reminds viewers of the tragedy that occurred. Cups and saucers of normal life before a ship went down can also make for fascinating images drawing a human connection to the ship.
- Shooting Down: Usually, our mantra in underwater photography is “shoot up,” but wreck photography is one of the times you can get away with shooting down. Often shooting straight from the surface down on a wreck (if the viz is good) can create an interesting perspective and have viewers realized the ship is resting on the seafloor.
- Silhouettes: Silhouettes of divers or large marine animals near a wreck can help add scale to an image. This can be achieved by having lots of contrast. For instance, having the sun behind the silhouetted subject (and wreck) and taking a mostly underexposed image can make the ship and the subject black but with blue water surrounding. Make sure the silhouette is separated from the wreck (so that they don’t seem to be part of the wreck). Increasing shutter speed and using a small aperture can help.

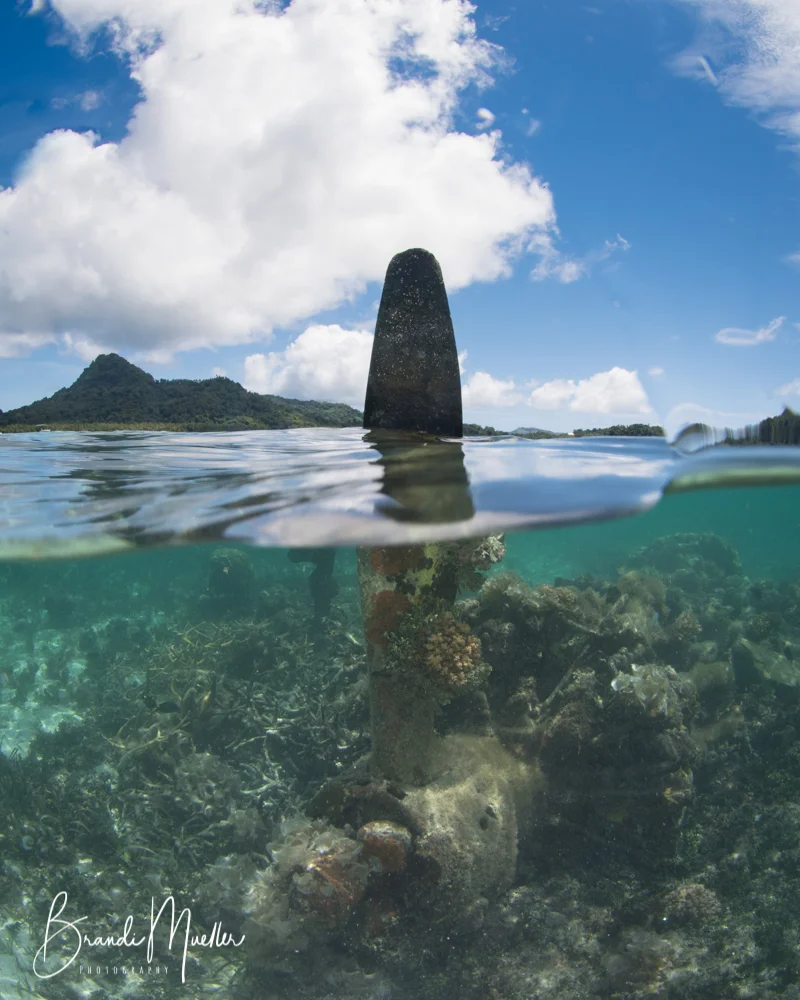
- Over-Under: If the situation presents itself, showing a wreck underwater and the surface in the same shot can make for a fantastic image that can help viewers understand where an image is being taken. It can also help tell a more complete story, such as an airplane that didn’t quite make the runway in underwater that is just next to a beach. Or a propeller sits just out of the water.
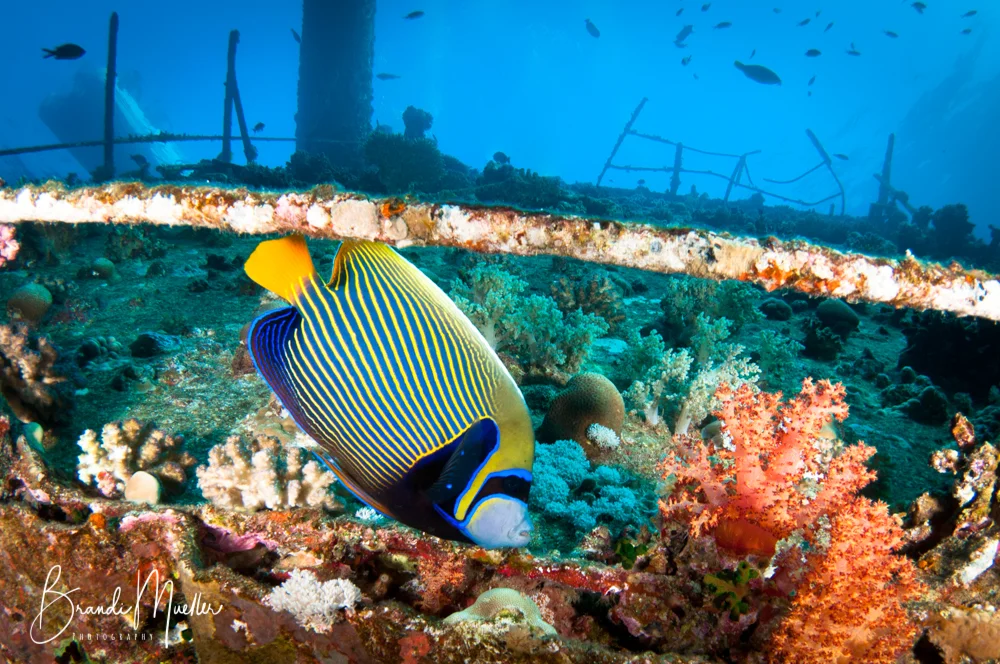
- Marine life on the wrecks: Don’t forget about the wondrous marine life that often encrusts and encompasses wrecks. I personally love to show the way the ocean has transformed these metal beasts into homes for marine life. A turtle swimming along a ship’s companionway, a fish that has made a home in a beer bottle, colorful anemones on a mast, the list goes on and on.
Key Shots
Every wreck has its iconic photos and even when trying to take creative and different images, it’s tough to leave a popular wreck without also capturing those “key shots.”
For instance, in Truk Lagoon, one of the most photographed spots is of Truk’s mascot, R2D2, an air compressor located in the machine shop of the Fujikawa Maru.
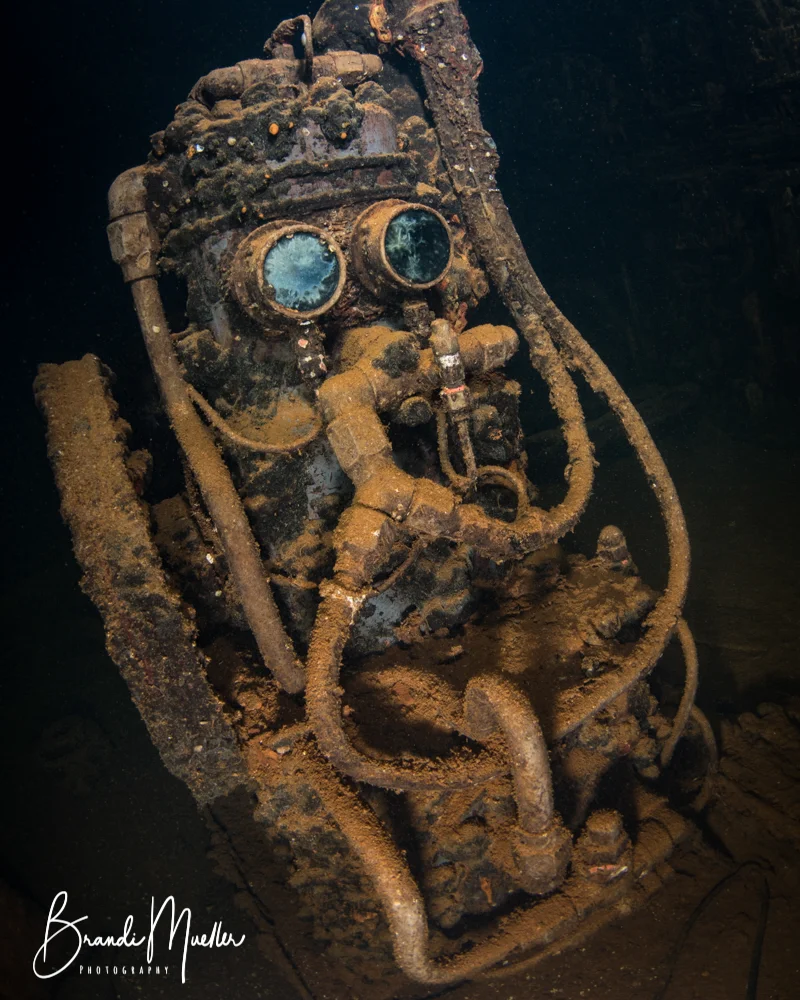
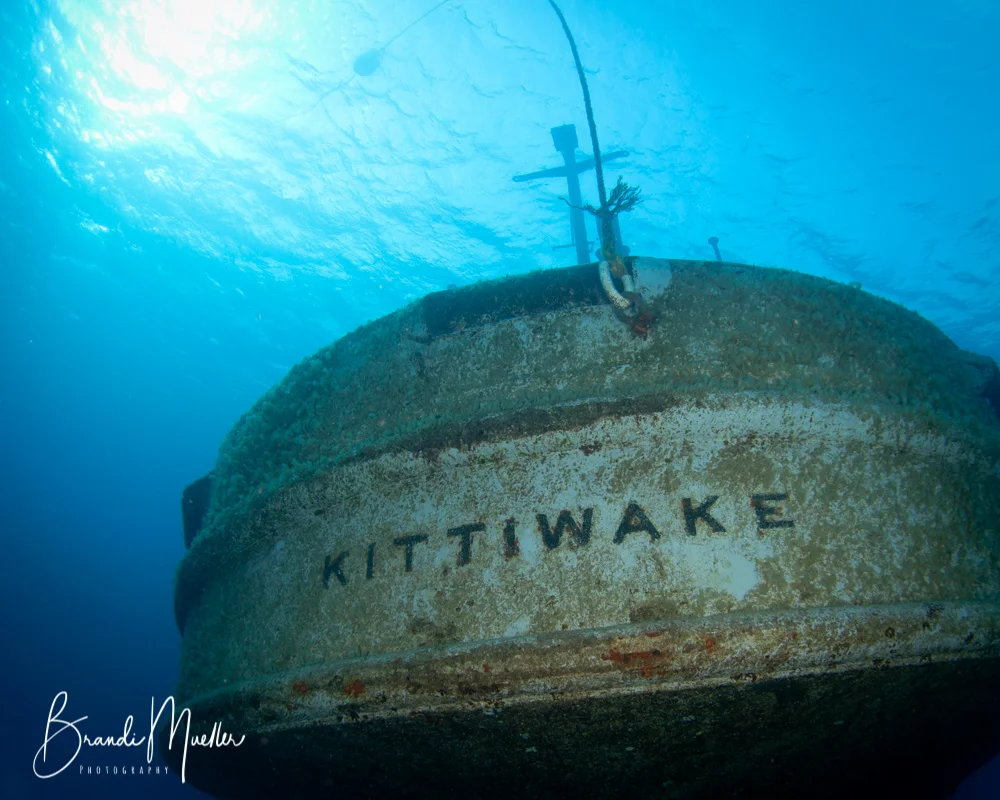
Things like propellers, bows, ship’s names written on the hull, wheelhouses, and popular artifacts like the motorcycles stacked in pick-up trucks in Egypt’s Thistlegorm are almost emblematic.
They are popular for a reason, and no matter how many times we see the motorcycles or R2D2, I think we all still smile and think, “How amazing.”
Macro
There are often plenty of macro opportunities on a wreck too. These new additions to the underwater environment can become prolific homes for marine life.
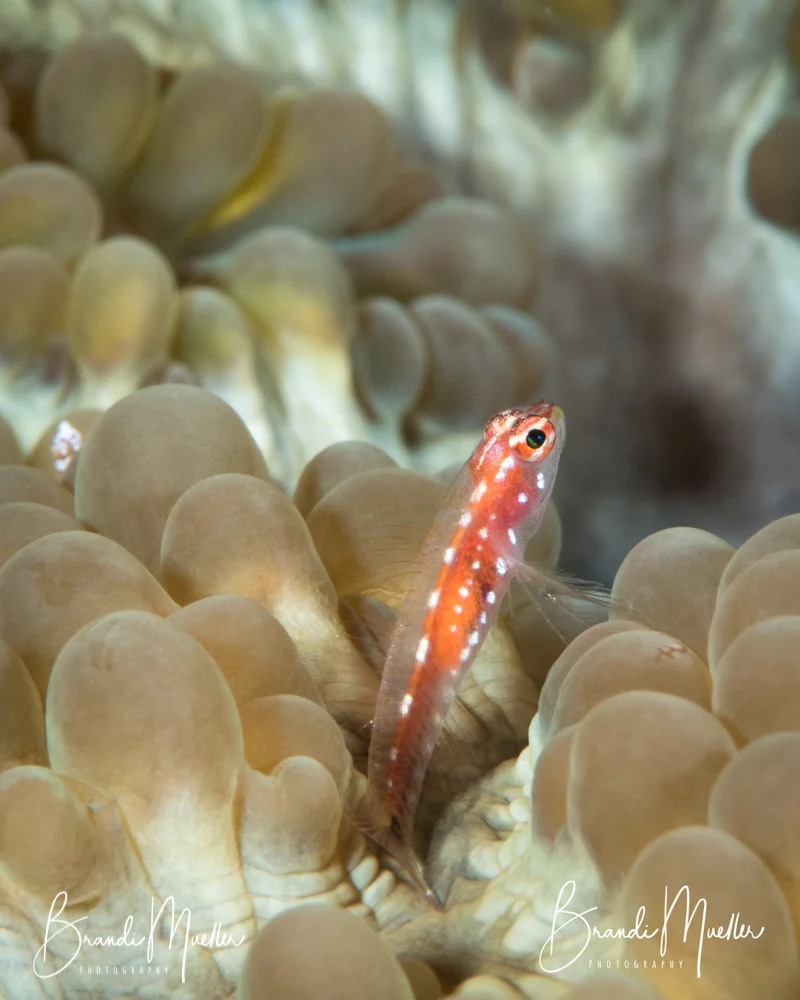
Corals and sponges can create fantastic abstract photos and nudibranchs are common on some wrecks.
Blennies, gobies and many species of juvenile fish may be found too. Don’t write off the potential for shooting macro on wreck artifacts either.
For instance, the writing on bullets may still be visible, or a plaque with writing that won’t be as sharp as wide angle. Shooting macro can also be a great way to still get images in situations where conditions are poor or just for fun.
Lighting
Lighting can be challenging in wreck photography, but it can also be one of the creative tools used to make artistic and different images that stand out.
I encourage “playing around with lighting” in all types of underwater photography, particularly wreck photography. You never know what you might come up with unless you try.
- Ambient Light: Sometimes it is best to turn off the strobes. The general rule is if your subject is more than six feet away from your strobe, it won’t make a difference and will only contribute to backscatter. When trying to get large parts of a wreck into one image, usually the strobes won’t help, so it’s best to turn them off. Instead, increase the ISO, and shoot with slower shutter speed (not too slow to avoid blur), and an open aperture.
- Preventing Backscatter: Adjusting strobes so that they are angled outward (or sometimes inward) can help to light up particles from the sides instead of directly on, so that they are not seen in the image. Having long strobe arms can help this, although that won’t always work in tight spaces inside wrecks, so once again, be prepared to try different angles and move your strobes around to see what works best in each situation.
- Close-Focus-Wide-Angle (CFWA): Light up the subject in the foreground, but also try to use the wreck as a shadow silhouette for an interesting background. This could be a colorful soft coral, an artifact, a part of the ship, etc.
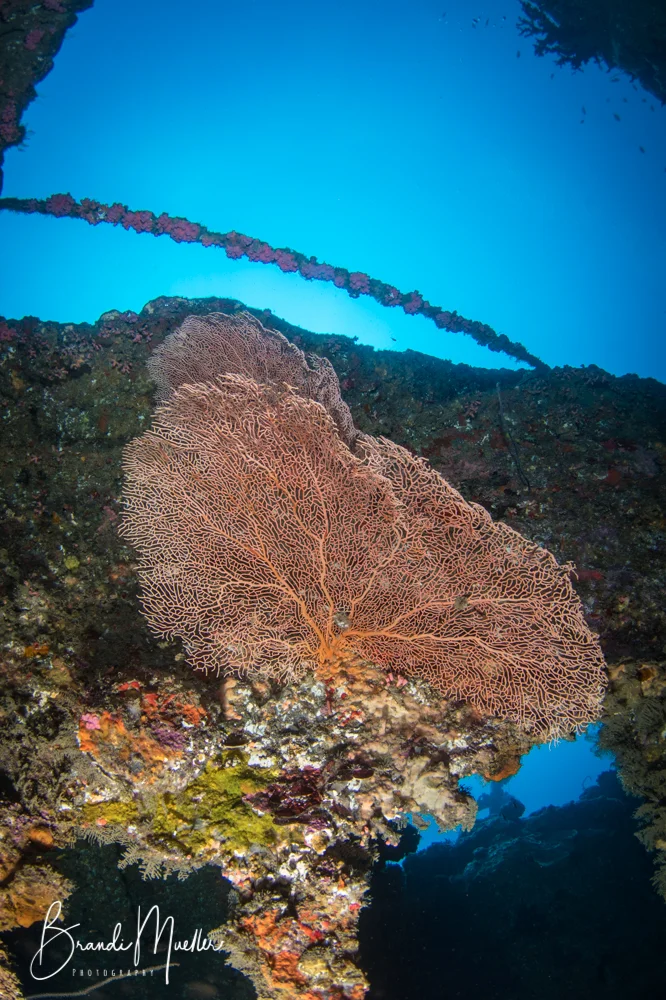
- Sunlight: Pay attention to the sun direction. If it is behind you and shinning on the wreck, it can help add light to the image. If it is behind the wreck, the portion of the wreck you are shooting may be difficult to not underexpose because of the bright light behind it. Time your dives accordingly. When also using strobes, such as in a CFWA situation, the strobes can light up the close subject, such as coral growing on a wreck and by using a small aperture and fast shutter speed, it can be possible to create a sunburst behind the subject.
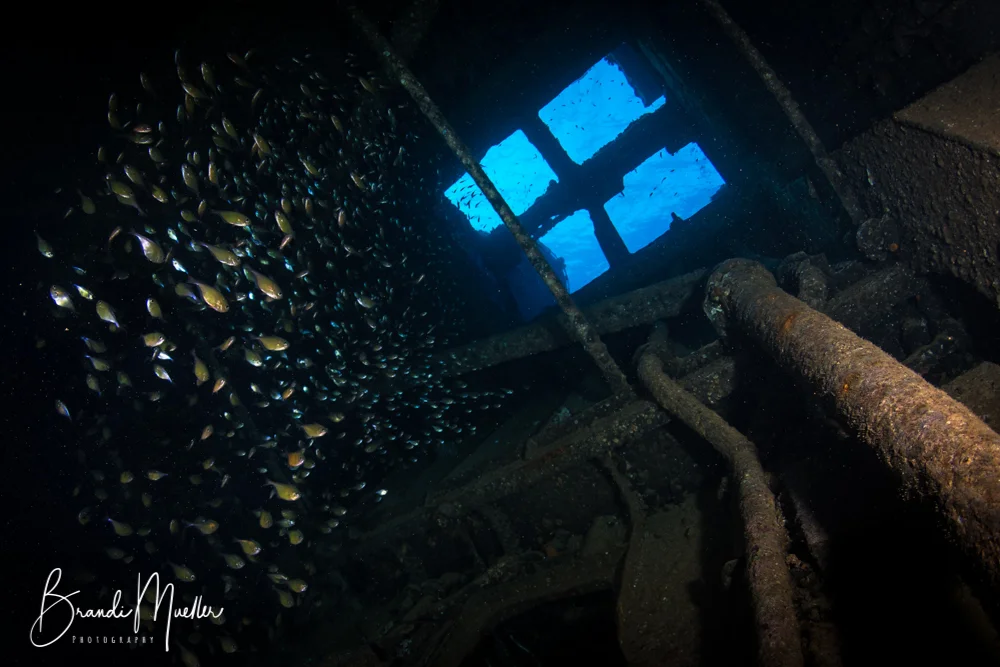
- 2nd Curtain Sync: Some cameras allow setting the flash mode to fire at the end of the exposure (in Nikon this is called 2nd curtain sync). This option is great when trying to light up an area with strobes, but also get blue water ambient light coming in from a porthole or another opening in the wreck. The blue light is captured first and then the strobes go off at the end of the exposure to light up the interior area.
- Off-Camera: Playing with off-camera lighting can be a lot of fun and lead to very creative images. Remote, slave-triggered strobes can be set up in different areas or high-powered lights can be staged to light up the insides of rooms or to shine a light in ways not possible from strobes or lights attached to the camera. Other divers can also support this (and add the element of divers in the image.)
Wreck Penetration
For those divers trained and comfortable with penetrating wrecks, the inside of ships can be very fruitful for photography. Never go into a ship without the training and knowledge to get back out.
There are different levels of wreck penetration as well, sometimes it is just the opening of a hold and other times, lines will be run and dive guides may lead photographers on long tours through a ship with little ambient light or places to get out of the ship.
Popular images from inside wrecks include those where you can see the blue light from outside the wreck. This can be achieved from being in an area such as a cargo hold and shooting back through the opening, or if a ship has open portholes.
The insides of wrecks can hold many things that are very cool to photograph. Warships, such as those in Truk Lagoon (Chuuk) have accessible galleys that still have cooking equipment, crew quarters with bunk beds, and hospital rooms.
Some still have the helms intact with steering stations and telegraphs. Trained divers can make the most of these situations and get great images.
Photographing in tight spaces can be challenging. Fisheye lenses that focus very close can be useful to achieve focus and still getting a very wide view when there isn’t much room to back up from a scene.
Lighting can be challenging to cover large areas and to prevent hot spots from strobes being very close to certain parts inside. Turning down strobe power can help and moving strobes so the light bounces off the inside of the space you are in. Taking several shots while moving strobes to find the perfect position is often the best way to get the shot.
Divers inside wrecks also make for great photos. Classic shots include divers moving through the wreck in front of you, focusing on the fins. Try not to only take shots of the backsides of divers.
A photographer can get ahead of the train of divers and turn around to capture faces or try to corner themselves off and get divers as they move past.
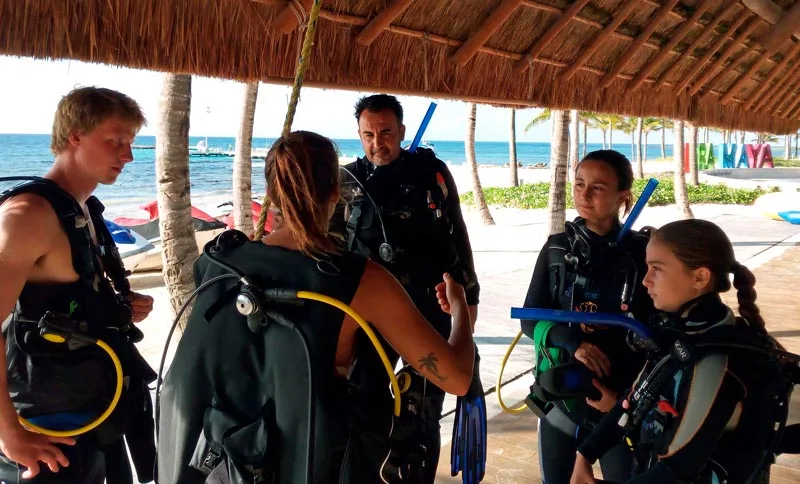
Again, planning for shots like these can lead to the best images, but communicating with other divers is vital if you want them to be good models.
Challenges
Wreck photography is not without challenges, but that is part of why great images of wrecks captivate us. One of the most difficult challenges is silt which can rain down from above photographers just by exhaling (or can be created in a cloud by a stray fin kick), which causes backscatter.
Having a plan for your image can help you get in, get the shot, and get out quickly without disturbing too much silt. Having good buoyancy is essential and frog-kicking keeps fins off the bottom of wrecks where the most silt is. (This doesn’t have to be inside the wreck either, just swimming along the ship and kicking near it can stir up silt the same way the sand gets stirred up.)
Focus lights are essential when shooting wrecks that are located in areas of bad visibly or when shooting inside so that cameras can focus faster and on what you want to be focused.
Focus lights can also be a source of backscatter though, so being able to angle them or move them to reduce lighting up particles can help.
Don’t forget to pay attention to dive depth, bottom times, and non-deco/deco time. Just like any dive, don’t get carried away in your photography and stop paying attention to your and your buddy’s safety.
Respect the wrecks which had a life lost on them. They are essentially underwater graves and should be treated as such. Check out local laws before diving wrecks as well, because in some countries war wrecks are illegal to dive.
Many countries also forbid the removal of artifacts, and it’s always best to leave these so that other divers can enjoy and photograph them as well.
The More You Know
Shipwrecks often have a history that can be researched or relayed via local dive guides. For the photographer, learning all you can before the dive can improve your photos by finding out what some of the signature shots of the wreck are, knowing what to look for, where to find it, and having a dive photo plan.
We always have a dive plan, so having a photo plan can help wreck photographers to be best prepared to get the images they desire.
Wrecks can be huge and due to limited bottom time and air supply, if the shot you want is the stern, but you spend all your time at the bow, you won’t get your shot.
Unless you are lucky enough to be one of the first to dive a certain wreck, use all the resources you have available such as checking out other’s photos.
Try not to copy them exactly, but they can help give ideas of shots you can get or you can use them to come up with your own ideas of how to add your personal creative flair.
Wreck safety
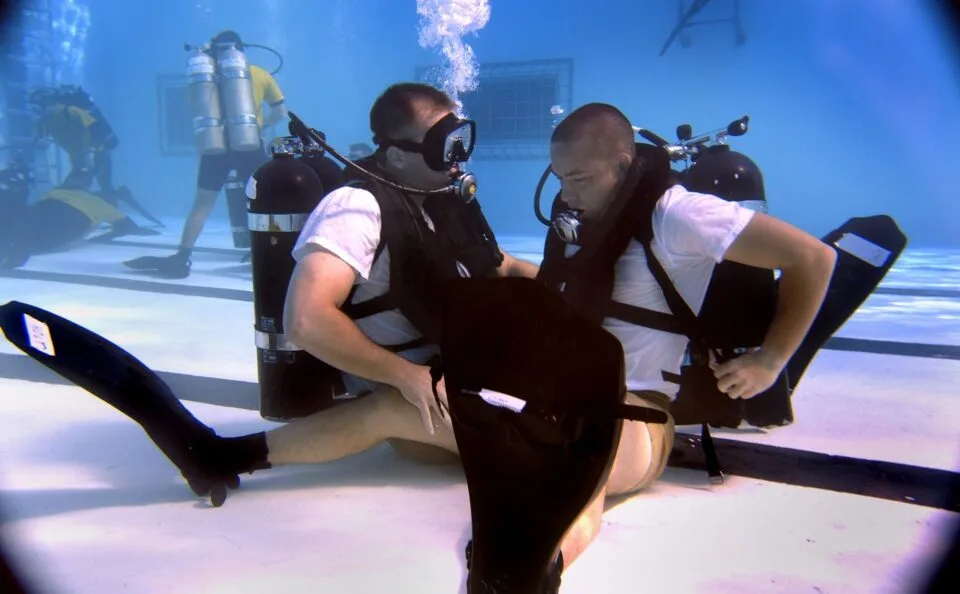
As with all diving, diver safety is of the utmost importance. Wrecks can have extra hazards, and divers should be cautious when diving them. Metal rusts underwater and will eventually disintegrate so be cautious of sharp points and the potential of collapsing sections.
Additional training such as wreck specialties can help prepare divers for the hazards and divers should not penetrate the wrecks without training and having knowledge about the state of the ship.
Buoyancy must be excellent as one wrong kick of the fins can cause silt that will decrease visibility (and also add backscatter to photos.)
Wrecks are excellent subjects for underwater photography; from wide-angle shots of enormous ships, showing the human connection of the ship’s past life, or even the tiny macro life found living and growing on wrecks.
There is plenty to keep all underwater photographers busy, and as always, take these tips and feel free to break all the suggestions and rules to create your own creative wreck images. Good luck!